Patients and participant charts
Open Patients in the clinical navigation. Confirm the active workspace before adding or editing a record. Screenshots show synthetic staging records, with no real patient information.
Find the right participant
- Choose All, Active, Pending, or Discharged. Pending includes pending intake, waitlist, and on-hold records; Discharged includes inactive records.
- Use Search patients for a name or diagnosis. Clear the search before deciding that a record is absent.
- Use Sort by and the direction control to order results. Use the pagination controls below the table to continue beyond the first page.
- Check the participant's date of birth, age, ID ending, and status before selecting Open chart or Quick view.
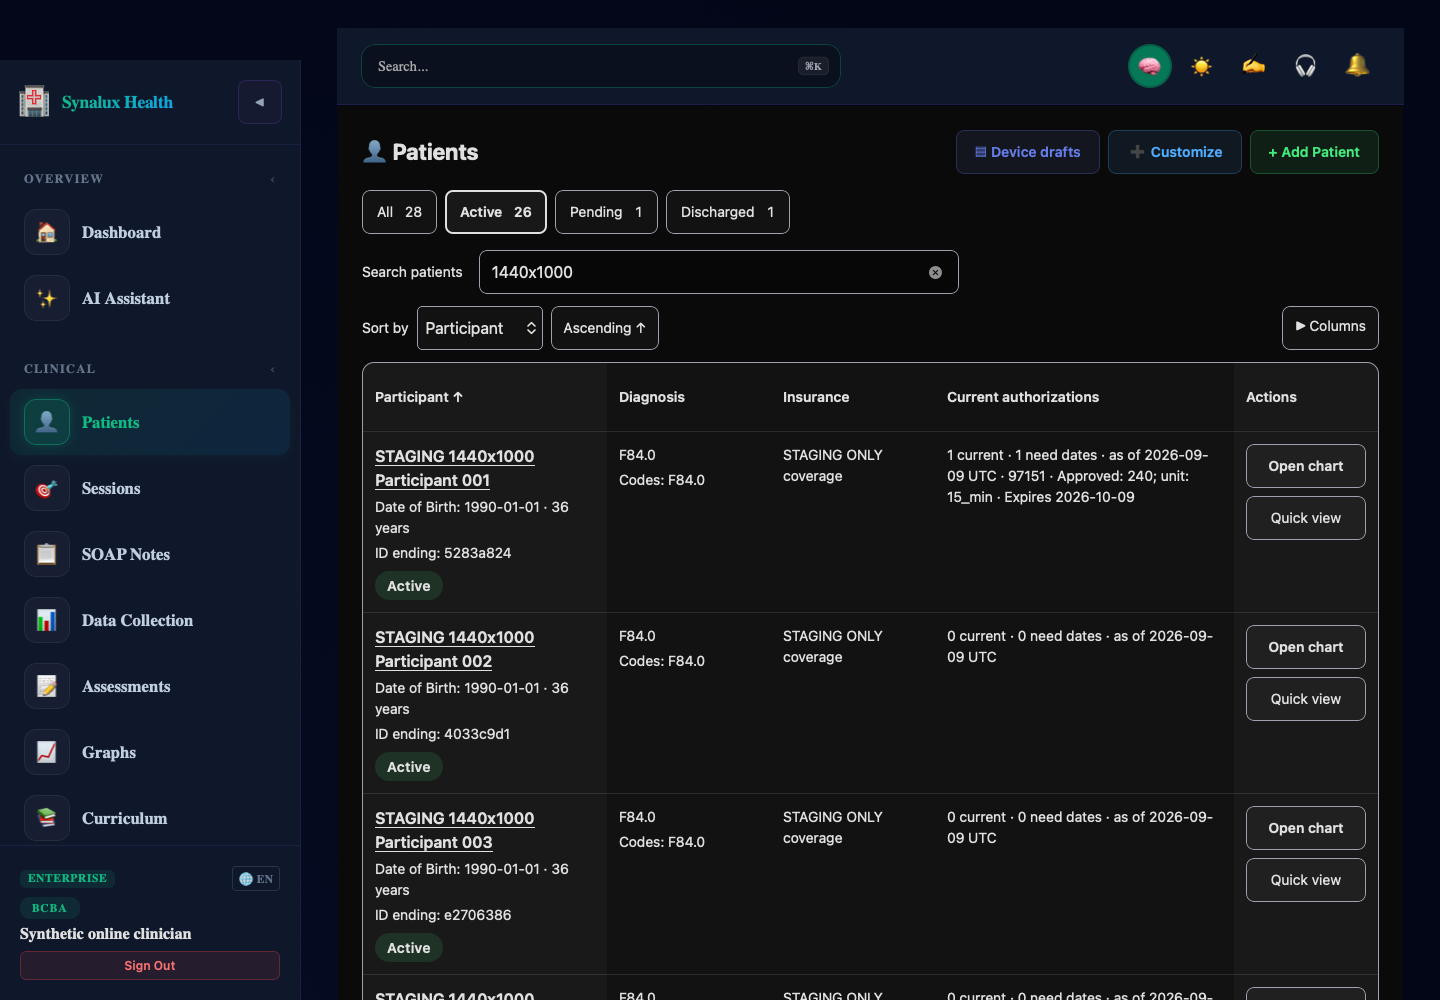
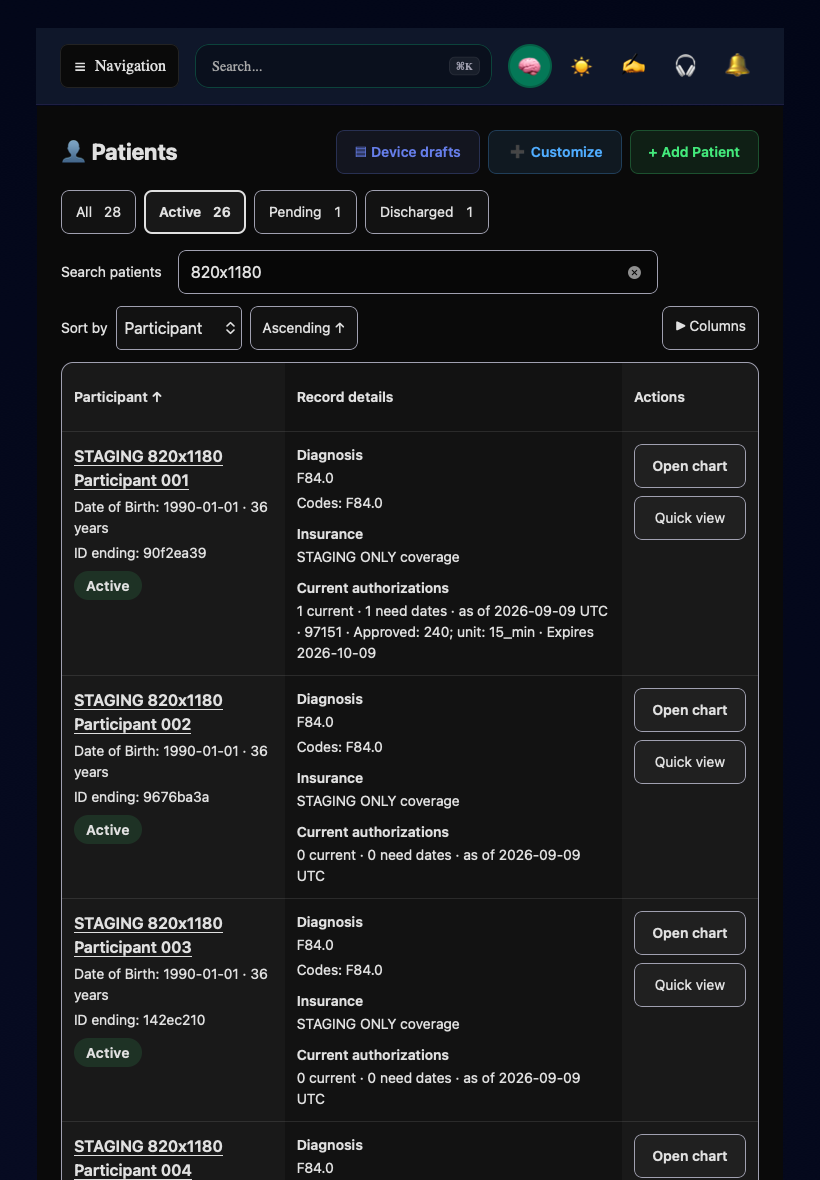
Columns controls optional diagnosis, insurance, and authorization details. On iPad portrait, these appear together under Record details. Current authorizations counts active records with both dates covering the displayed UTC date. Records that need dates are counted separately. For one current authorization, the list shows the service, approved units in their recorded unit type, and expiry. Multiple services are not added together. This summary does not establish remaining units or insurance eligibility. An unavailable summary requires retry; it does not mean no authorization exists.
Add or update a participant
- Select Add Patient.
- Enter first name, last name, and date of birth. Complete the available gender, diagnosis, additional diagnoses, insurance provider, member ID, and guardian contact fields as applicable.
- Save the form and confirm that the record appears in the list.
- For an existing participant, open Quick view, select Edit patient, make the correction, and save. Reopen the record to confirm the saved details.
A loading or permission error is different from an empty list. Use the displayed retry action; do not create a duplicate patient to work around a failed read.
Move around the chart
Use Quick view for an overview and programs without leaving the list. Use Open chart for the full chart. On desktop, use the grouped chart tabs; in iPad portrait, use Chart section to choose sections such as documents or sessions. Browser Back and reload retain the selected chart section.
Programs and curriculum goals
- Open Quick view, then Programs.
- Open or add the participant's program.
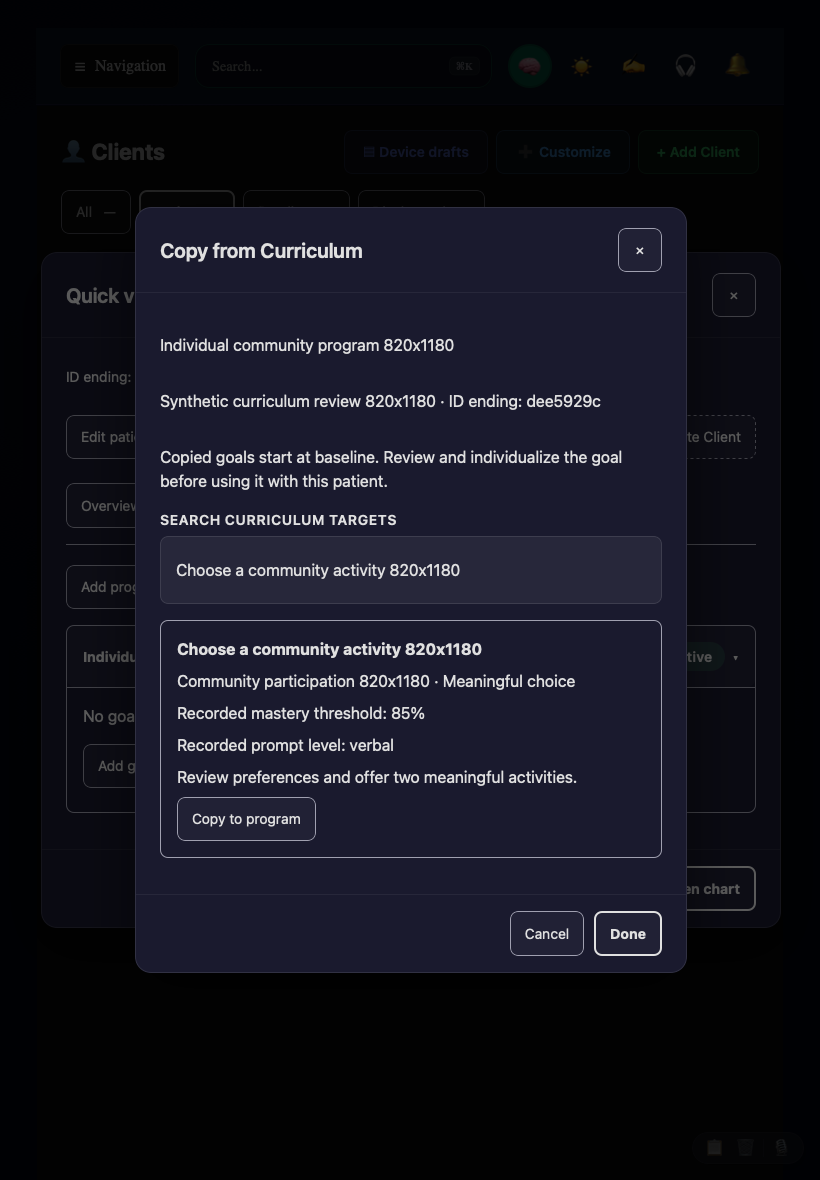
- Select Copy from Curriculum and search for a target.
- Read its instructions, mastery threshold, and prompt level. Confirm the participant and destination program above the results.
- Select Copy to program, then Done. Review and individualize the copied goal before using it. Copied goals begin at baseline.
If a save is interrupted
Keep the editor open and read the displayed save or recovery status. Device drafts provides access to retained work when available. For a conflict, compare the retained edit with the current server record and explicitly choose the fields to transfer or keep. Text visible in the editor may not have reached the server. Avoid clearing browser storage while recovering work.
Continue with Assessment documents and PDFs, Adult FBA and BIP, or the BCBA workflow guide.